3D Printer Repair: How To Do It Right
If you’re like most 3D printer users, you probably don’t think much about repair until something goes wrong. But if you take a little time to learn some basic repair techniques, you’ll be able to keep your 3D printer in good shape and fix most problems that come up.
In this post, we’ll show you how to troubleshoot and repair common 3D printer problems. With a little know-how, you can keep your 3D printer running smoothly for years to come. So let’s get started!
Check the filament path for any blockages
3D Printer repair can be overwhelming, but a quick check of the filament path for blockages can help keep things running smoothly. Start by lifting off the 3d printer cover and examining through the plastic tube. If you spot any buildups, it’s time to take action!
Sculpting software typically provides a variety of digital sculpting tools that simulate real-world sculpting tools such as brushes, chisels, and clay. It allows artists and designers to shape and manipulate virtual objects in a digital environment, mimicking the process of traditional sculpting but with the advantages of digital tools. SelfCAD, a reliable 3D Sculpting Software helps you with exactly this. Its tools allow users to push, pull, smooth, carve, and manipulate the virtual material to create intricate and detailed sculptures.
Your 3D printer might need a bit of cleaning, so make sure to follow any instructions that come with your machine. You’re almost done! Reattach the 3d printer cover and voilà, your 3D printer is now ready to start 3d printing again.
Clean the print head
3D printers require occasional maintenance, such as cleaning the print head. Let’s understand how you can clean the print head.
It’s really no more complicated than using the nozzle cleaner included in your 3D printer repair kit. In fact, it is quick and simple; just follow the instructions provided with your 3D printer and perform a thorough 1-2 times per month cleaning of your print head. The end result will be smoother 3D-printed products every time!
Replace the build plate if it is damaged
The process for replacing a 3D printer build plate can vary depending on the specific printer model, but in general, the following steps can be followed:
- Turn off and unplug the 3D printer to avoid any potential electrical hazards.
- Remove the existing build plate from the printer bed. Some printers may have clips or screws holding the build plate in place that need to be removed, while others may have a magnetic attachment that can be easily detached.
- Clean the printer bed to remove any debris or residue left from the previous build plate. This will help ensure good adhesion for the new build plate.
- Install the new build plate onto the printer bed. Make sure it is properly aligned and securely fastened to the bed.
- Level the new build plate if necessary. Some printers have an auto-leveling feature that can be run after installing the new build plate, while others may require manual adjustment.
- Check the new build plate for any defects or damage before using it for printing.
Level-the-bed
3D printer repair is a lot more common than it used to be—after all, 3D printers are becoming increasingly popular and accessible. One of the most important 3D printer repairs you can make is to level the bed. It’s a relatively easy process, but an essential one: your 3D printer won’t work properly if the bed isn’t level.
You’ll need to check for bed leveling issues on a regular basis so that your 3D printer functions correctly and you can keep working away with minimal disruptions.
If you’re having difficulty leveling the bed yourself, there are probably local companies that offer 3D printing services and they’d likely be able to guide you through it in no time.
Tighten any loose screws or parts
Loose screws or parts in a 3D printer can cause a range of issues, including misaligned prints, poor print quality, or even printer malfunctions. Here are some steps to help tighten loose screws or parts in a 3D printer:
- Turn off and unplug the 3D printer to avoid any potential electrical hazards.
- Identify the loose screw or part. Depending on the printer model and the location of the loose component, this may require disassembling some parts of the printer to access the problem area.
- Use a screwdriver or other appropriate tool to tighten the loose screw or part. Be careful not to overtighten, as this could strip the threads or damage the component.
- Check surrounding screws or parts to ensure they are also properly tightened, as nearby looseness can contribute to the problem.
- Reassemble any disassembled parts of the printer if necessary.
- Turn the printer back on and test a print to ensure the issue has been resolved.
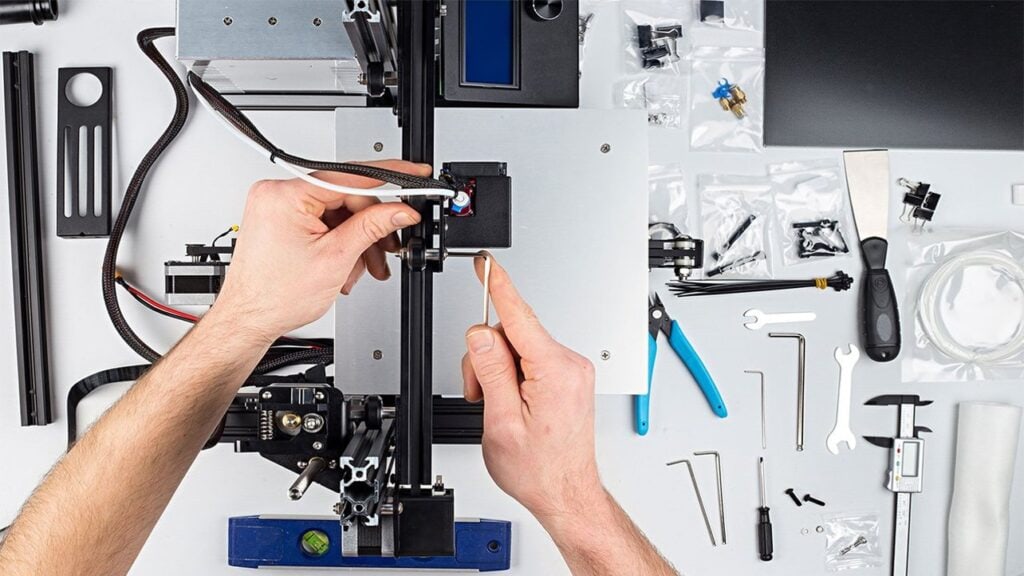
Inspect the gantry and Z-axis for any looseness
When it comes to conducting a 3D printer maintenance check, inspecting the gantry and Z-axis is an important step. Experiencing any looseness in the gantry or Z-axis can cause problems with printing calibration and other issues, so it’s essential to ensure they’re secure.
Thankfully, this doesn’t take too long; all you need to do is carefully examine both components and make tightening corrections if needed. If anything feels loose that probably shouldn’t be, it’s best to call a professional for further guidance.
Inspecting the gantry and Z-axis doesn’t have to be stressful—just remember to stay vigilant so that your 3D printer will run perfectly every time!
Advanced Repair Techniques
- Replacing faulty parts such as the extruder, hotend, or stepper motors: Replacing faulty parts is an advanced repair technique that requires a certain level of technical knowledge and experience. When replacing a part, it is important to first identify the specific component that is causing the problem. This may involve conducting tests, such as checking the resistance of the motors or measuring the temperature of the hotend. Once the faulty component has been identified, following the manufacturer’s instructions carefully when replacing it is important. This may involve disassembling the printer, disconnecting wires and cables, and removing screws or nuts. When installing the new component, it is important to follow the manufacturer’s instructions for connecting it, and reassembling the printer in the reverse order.
- Calibrating the printer’s axis and motion systems: Calibrating the axis and motion systems of a 3D printer involves fine-tuning the printer’s movements and ensuring that they are accurate and consistent. This process may involve adjusting the printer’s belts and pulleys, as well as its motors and sensors. To calibrate the printer’s axis and motion systems, it is important to first consult the manufacturer’s instructions, as the process will vary depending on the specific printer model. Calibration may involve making adjustments to the printer’s software, such as entering new values for the steps per millimeter or adjusting the physical components of the printer, such as the motors or pulleys.
- Upgrading the 3D printer’s hardware or firmware: Upgrading the hardware or firmware of a 3D printer can improve its performance and resolve software or hardware-related issues. Upgrading the firmware may involve downloading and installing new software from the manufacturer’s website, while upgrading the hardware may involve installing new components such as a new extruder, hot end, or control board. Before upgrading the hardware or firmware, it is important to consult the manufacturer’s instructions and make sure that the new components are compatible with the printer. Upgrading the printer may also require technical knowledge and experience, and it may be necessary to seek professional help.
Conclusion
If you find your prints are coming out dirty or with missing layers, there are a few things you can check on your 3D printer.
First, take a look at the filament path to see if anything is blocking it from feeding smoothly. Next, clean the print head to remove any debris that might be causing issues.
You should also make sure the build plate is level and secure, and that all screws and parts are tight. Taking these steps should help you get better-quality prints.