Comprehensive Guide: Learn How to Transfer Photos from iPhone to External Hard Drive
Photographers love to capture photos with their iPhones, leaving little to no space in their phones. As a result, the phone may show a message alerting people about low disk space. To address this issue, they can transfer all your photos onto a personal computer or external hard drive. We will provide helpful tips for moving photos from one device to another. This article will look at steps to transfer iPhone photos to the external hard drive.
Part 1: What are the Benefits of Storing iPhone Photos on External Hard Drive?
If you choose to transfer data from your phone to external devices, it will save much-needed space. Some of the other benefits of carrying out this transfer are given below:
- iPhone Storage: It is clear that phones often have limited storage, and photos can take up lots of space. Therefore, you can clear out storage space by transferring iPhone photos to an external hard drive.
- iCloud Storage Cost: An iPhone user should avoid using iCloud for photo storage as additional costs exist because you are only given 5GB of free storage. Instead, using a hard drive to transfer all your files is an effective solution.
- Fast Processing: External hard drives offer a fast-processing mechanism that simplifies the transfer process. Transferring large files to the hard drive through your iPhone will be quicker.
- Offline Accessibility: You can easily access your images from an external hard drive without an internet connection. Also, you can easily access your pictures and videos from anywhere.
- Security Concerns: Some users may be concerned about the privacy and security of their photos. Moreover, storing your data on an external hard drive keeps it secure from any harm.
Part 2: What Preparations You Should Perform Before Transferring iPhone Photos to External Hard Drive
Now, let’s learn about what preparations you should be aware of before transferring iPhone photos to the external hard drive. However, users can also use an app to transfer photos from iPhone to PC. With that, let’s have a look at the following points that will help you understand how to prepare first:
- Charge Your iPhone: It is essential that your phone is fully charged or has enough battery for the process. You need your iPhone charged up to 50% as photo transfer is time-consuming.
- USB Cable: Users should ensure they have a USB cable compatible with their hard drive and iPhone. Therefore, having the original USB cable ensures a secure connection during the transfer process.
- Backup Your iPhone: You should note that before you transfer photos from your iPhone to an external hard drive, back up your phone. It is to ensure that all your data is safely backed up in case of an accident.
- Hard Drive Compatibility: The transfer process requires a hard drive compatible with your Windows PC. You can format the external hard drive in a file system that is compatible with the system.
Part 3: One-Click Solution To Transfer Photos from iPhone to External Hard Drive
Wondershare MobileTrans is a multipurpose tool that can simplify the process of transferring data from your iPhone to a Windows PC. Moreover, it can transfer up to 18 data types, including photos, files, and videos. This phone transfer toolkit supports over 6000 mobile devices running on iPhone or Android. Furthermore, this tool ensures a seamless transfer experience, allowing users to export various data types, including contacts and messages.
It also has an App Transfer feature to help you transfer applications from Android to Android and iPhone. Moreover, with Wondershare MobileTrans, you can shift your iCloud data to your Android smartphone. This tool is also quite lightweight, which makes the photo transfer blazing-fast and lag-free.
Key Features
- If you are transferring iPhone photos to an external hard drive, this tool protects your device data without overwriting it.
- It provides much faster file transmission than transferring data with Bluetooth or apps. In addition to that, there is no need for Wi-Fi or internet connection during the transfer process.
- You can always count on MobileTrans to access your files, photos, and videos on the go. It is an easy process of transferring photos and videos from phone to computer.
Simplified Guide To Transfer Photos from iPhone to External Hard Drive via MobileTrans
The following method explains how to move photos from an iPhone to an external hard drive. Let’s look at the following steps to transfer pictures to a hard drive:
Step 1: Attach Your iPhone to Your Windows PC
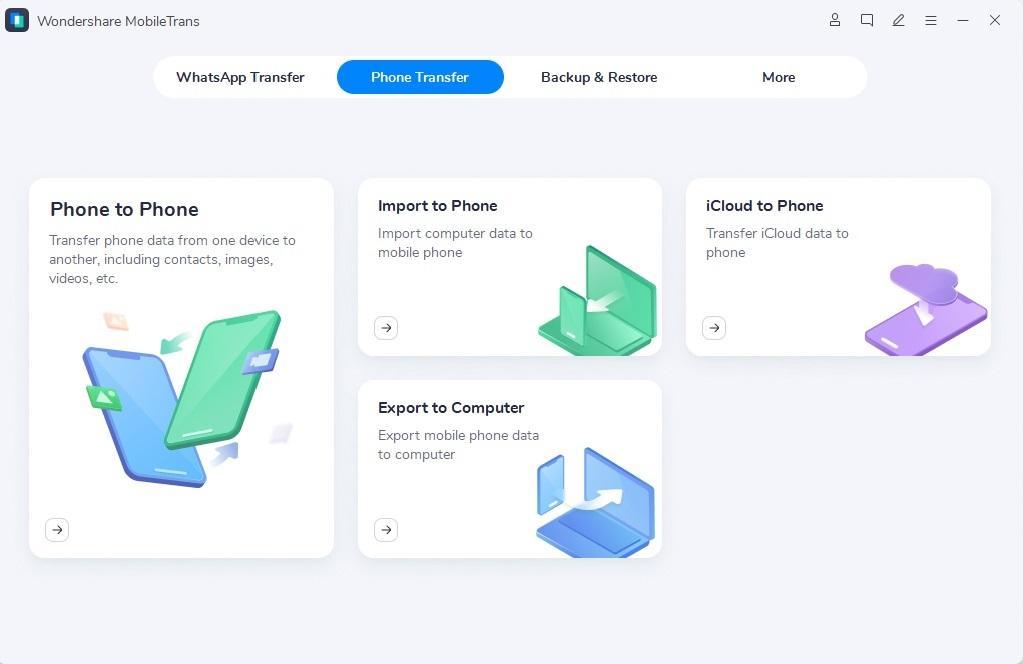
Start by connecting your iPhone to the computer with the Apple-certified USB cable. After that, launch Wondershare MobileTrans and go to the “Phone Transfer” tab. From here, choose the “Export to Computer” tool to access your iPhone data.
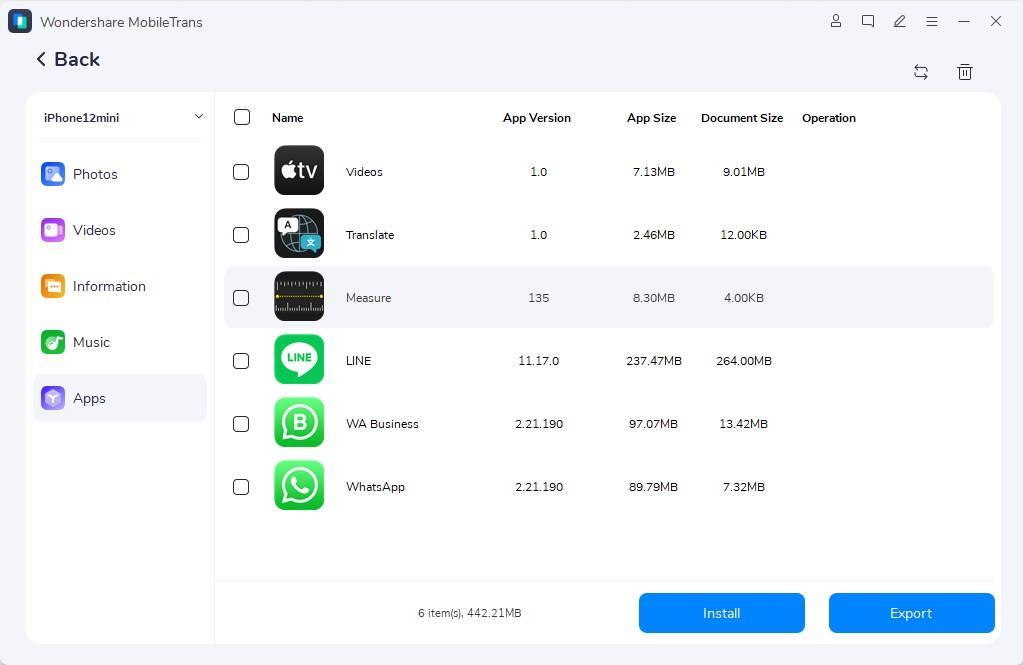
Step 2: Select Desired Photos for Transfer
On the left side panel, click on the “Photos” tab. Select the desired photos you want to transfer to the computer’s hard drive and hit the “Export” button. Following this, choose your external hard drive as the destination and ensure your iPhone is properly connected to the computer for successful transfer. If the connection wire is loose in any way, the transfer process will not stop.
Final Words
At the end of this article, we have understood that making room for moving storage data can be achieved by transferring data to your computer. Therefore, in this case, Wondershare MobileTrans provides the best solution for moving photos from an iPhone to an external hard drive. If you follow this method, it can be very beneficial to you in real time. So, download this tool today to explore other features and methods of transferring files.